 toolbar icon.
In order to change a modules parameters
the Configuration View for that
product must be opened. To open a products Configuration
View, right click the product desired and select -> View
Configuration or click the View
Configuration toolbar icon.
Below is a description of the various types of nodes that a Configuration View can be opened for.

 Product
Node
Product
Node
Opening this node will display the complete configuration view for the product selected.
 Product Video Input Node
Opening this node displays the configuration view for the selected video input.
 9000NCP Network Control Panel Node
Opening this node allows setup and configuration of a 9000NCP(2)
(see the 9000NCP(2) manual for information on how to use the Network Control Panel with VistaLink PRO)
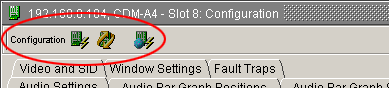
At any time you may refresh the configuration view that you have open. Performing this option will synchronize your view with the information contained in the product. Any configuration changes that have not been applied to the product will be overwritten after executing a refresh.
To refresh the view, select Configuration
-> Refresh or click the
Refresh button found on the top of each configuration
view window.
button found on the top of each configuration
view window.
VistaLINK™ PRO can automatically refresh an open configuration view. This is useful if you want to monitor a parameter that changes frequently. To enable Automatic refresh select Configuration -> Auto Refresh from the main menu. A check mark should appear to the left of the menu item. To disable, select Auto Refresh again. The check mark should disappear.
An alternate method would be to select the
 button on the toolbar. When Auto refresh is
enabled the toolbar button should appear green with a plus (+) sign
button on the toolbar. When Auto refresh is
enabled the toolbar button should appear green with a plus (+) sign  in the bottom right corner of the button. When disabled,
the toolbar button should appear red with a minus (-) sign in the bottom
right corner of the button.
in the bottom right corner of the button. When disabled,
the toolbar button should appear red with a minus (-) sign in the bottom
right corner of the button.
The refresh interval will depend on your network conditions. The refresh operation is a continuous cycle meaning that the refresh will start with the first parameter, continue until the last parameter has been refreshed and start from the beginning again.
Note: Automatic Refresh and Dynamic Apply cannot be enabled at the same time.
Applying Changes Made to Configuration
When changes are made to a product's configuration settings the changes need to be applied. There are two methods of applying changes: Dynamically and Deferred.
Deferred apply refers to the process of making one or more changes and then manually requesting for those changes to be sent to the product. Deferred apply also has the advantage of being able to chose how the changes are to be applied. Applying changes using this method can be performed using the toolbar buttons found at the top of each Configuration View window. Please see below for a list of deferred options and their descriptions:
Apply
Changes  - applies only the configuration settings
that have been changed in the configuration view since the last apply
operation. To apply just the changed settings, select Configuration -> Apply Changes from
the main menu or click the Apply Changes
toolbar button located at the top of each Configuration
View window .
- applies only the configuration settings
that have been changed in the configuration view since the last apply
operation. To apply just the changed settings, select Configuration -> Apply Changes from
the main menu or click the Apply Changes
toolbar button located at the top of each Configuration
View window .
(Global) Apply To
Same Product Types  - applies only the configuration
settings that have been changed since the last apply operation to all
similar products. This is the same operation as the Apply item except
that the configuration settings will be applied to all like products.
For example, if the configuration is being applied for an AVM card, this
operation would apply the same settings to all AVM's currently in the
Navigation View. To apply changes to all similar products, select
the button on the toolbar.
- applies only the configuration
settings that have been changed since the last apply operation to all
similar products. This is the same operation as the Apply item except
that the configuration settings will be applied to all like products.
For example, if the configuration is being applied for an AVM card, this
operation would apply the same settings to all AVM's currently in the
Navigation View. To apply changes to all similar products, select
the button on the toolbar.
Note: Deferred apply is a verified process. This means that once the configuration has been applied the same configuration will be read back from the product to verify that all settings have indeed been set to the proper value.
Dynamic apply refers to the process of updating the product in real time as the configuration settings are being made. Dynamic apply cannot be applied to all product types as can Deferred apply. To enable dynamic apply, select Configuration -> Dynamic Apply. A check mark should appear to the left of the menu option. To disable, select the Dynamic Apply option again. The check mark should disappear if disabled.
An alternate method would be to select the
 button on the toolbar. When Dynamic apply
is enabled the toolbar button should appear green with a plus (+) sign
button on the toolbar. When Dynamic apply
is enabled the toolbar button should appear green with a plus (+) sign
 in the bottom right corner of the button. When
disabled, the toolbar button should appear red with a minus (-) sign in
the bottom right corner of the button.
in the bottom right corner of the button. When
disabled, the toolbar button should appear red with a minus (-) sign in
the bottom right corner of the button.
Note: When Dynamic apply is enabled, the Apply and Apply to Same Product types buttons will be disabled. Dynamic Apply cannot be enabled if Auto Refresh is active.