To build a system for offline manipulation of switcher setting data, install just the BZPS-8002 software on a client computer.
In this case, install the following two items of software in this sequence.
Notes
When you install the software on the client PC, you must make the following settings.
Installing the JRE (Java Runtime Environment)
- Insert the CD-ROM holding the BZPS-8002 software into the computer's disc drive.
- Open the Client folder within the CD-ROM, and double-click "jre-6u43-windows-i586.exe."
The Java Setup dialog box opens, and the License Agreement window appears.
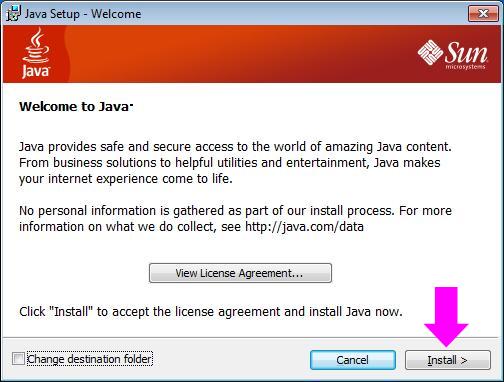
- If you agree with the license terms, click the Install button.
This carries out the installation.
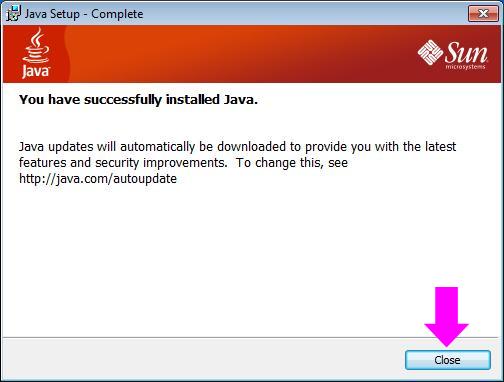
- Click the Close button, to close the dialog box.
Installing the BZPS-8002 software
- Insert the CD-ROM holding the BZPS-8002 software into the computer's disc drive.
- Double-click "setup8002.exe" within the CD-ROM.
The BZPS-8002 SONY Switcher Setup Software dialog box appears.
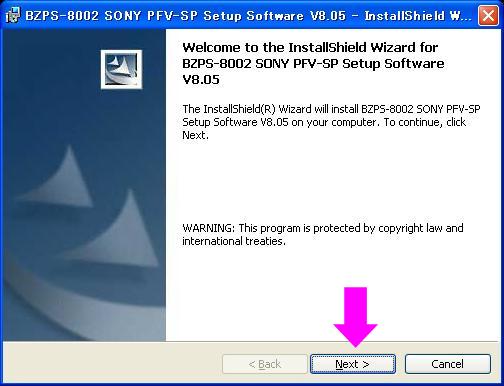
- Click the Next button.
This carries out the installation.
When the installation is completed, the Finish button becomes active.
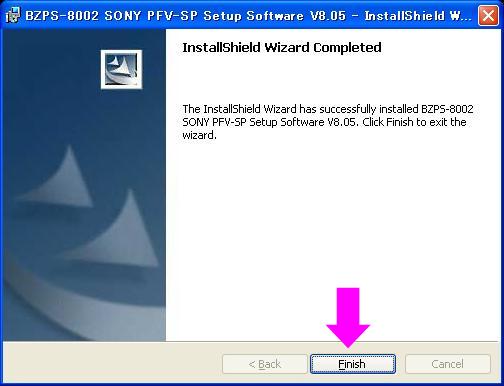
- Click the Finish button to end the installation.
Disabling the User Account Control (Later than the version of Window Vista�j
For Windows Vista
- Select the menus in the order of: Control Panel > User Accounts > Turn User Account Control On or Off (for the classic view).
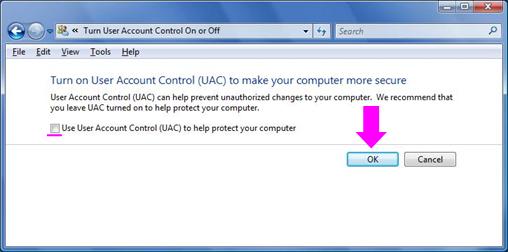
- Uncheck the item of "Use User Account Control (UAC) to help protect your computer".
- Click the OK button, to close the dialog box.
For Windows 7
- Select the menus in the order of: Control Panel > System and Security > Change User Account Control settings (for the classic view).
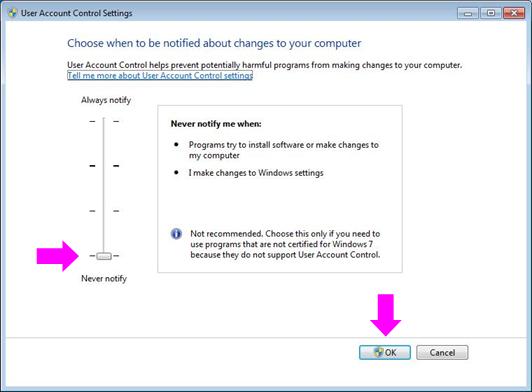
- Set the parametaer of the left side "Never notify".
- Click the OK button, to close the dialog box.
Disabling the Java Update function
- Select the menus in the order of: Control Panel > Java (for the classic view).
- Click the Update tab.

- Uncheck the item of "Check for Updates Automatically".
- Click the Apply button.
- Click the OK button, to close the dialog box.
Next, set the IP address.
