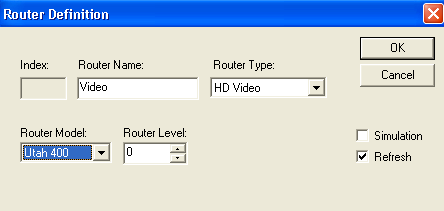
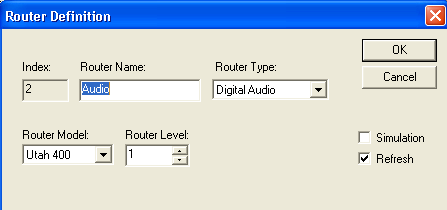
Adding Physical Routers
- The router table is to be filled in with the physical router levels. The name, router type and router model are not critical, but should be as accurate as possible relating to each physical router for information purposes.
- The physical router levels must be exact per the dip switch setting of each router.
- The simulate table should always be off. Enable this to on to allow switching to be simulated to any specific level. This may be good for troubleshooting a router that doesn’t appear to be switching. This would confirm that the configuration is good. Note: When on, this will always appear that the level is working and will display as such in the control panel level window.
- The refresh table should always remain on for all levels.
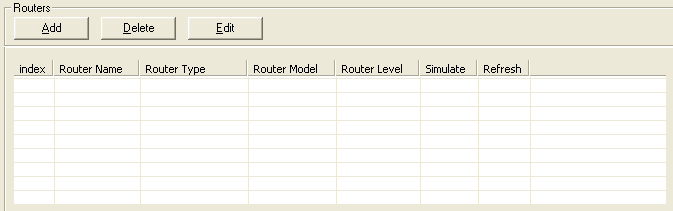
- Click the ‘Add’ button to get the tables below. This must be done for each physical router. Type the desired name for the router in the ‘Router Name’ window.
- Click the drop down arrow in the ‘Router Type’ window and select the closest selection to the type of router it is.
- Click the drop down arrow in the ‘Router Model’ window and choose UT400 for every router except UT300, AVS and third party router types. Note: This is not critical and is used for information only.
- Click the up and down arrow for the ‘Router Level’ selection and choose the physical number for that level. This is the physical setting on the MX router level which is the exact setting found on the dip switch which counts in binary. Example: 0 is literally a dip switch binary setting of 0. 1 is literally a dip switch binary setting of 1. And so forth. The two figures below show the results of steps 1-4 above.