Creating Salvos
- Double click on the SC4 icon or right click on it and click ‘Edit’.
- Click the button titled ‘Salvos’
 in the upper right section and the following window will appear.
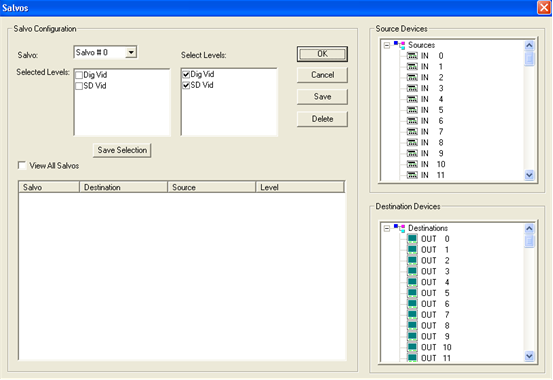
- Choose which salvo to configure by dropping down the arrow in the ‘Salvo’ window. The number 0 is the first salvo and the choices should go to 127.
- In the ‘Select Levels’ window, choose the levels that will be required to switch sources and destinations. If it's all levels, then leave them all checked as they appear. These can be modified later if needed.
- Choose the destinations first, from the ‘Destination Devices’ list in the lower right corner, that will be part of the salvo by left clicking on the output name and while holding the mouse button down, drag the name onto the main table. Notice that the ‘Level’ column will have the word ‘All’ for each line. How to customize the levels is shown in step 9 below.
- Outputs can be dragged individually or as a group. To group multiple outputs, click and hold the mouse button down on the first output and then using the ‘Shift’ key or the ‘Ctrl’ key, click on all the other outputs that are needed. Drag that group to the table and let go of the mouse button. Note: Outputs can be added to the table by simply double clicking the output names in the destination device list, after at least a single entry is are already placed on the table.
` 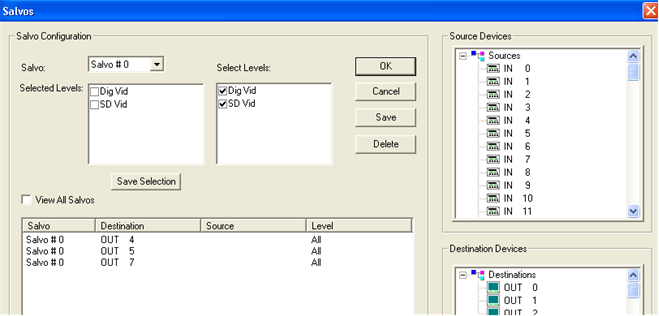
- The table above shows three outputs only for Salvo 0. Next, drag the desired inputs from the ‘Source Devices’ list in the upper right corner, to each of the outputs that they will be switched to. As with the destinations, groups of inputs can be dragged to outputs however, they will be added to the destinations in the order they are highlighted, and from the destination that they are dropped onto and down from there. Only one input can be assigned to any given output but that same input can be assigned to as many outputs as desired. Same rules for dragging apply.
- Click the ‘Save’ button located just to the right of the ‘Select Levels’ table. This will save the salvo that is currently selected in the ‘Salvo’ drop down window.
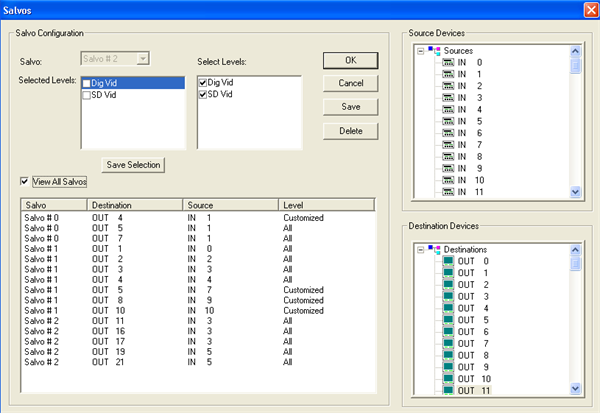
- If one or more of the outputs in the salvo need to have less than all of the levels assigned to it, then click directly on the output line in that salvo, on the table, and note that in the upper left window titled ‘Selected Levels’ it will show the levels with check marks on each one that is active for that output.
- Uncheck or check all the desired levels in the left (Selected Levels) window for that output and then click the button titled ‘Save Selection’ just below that window. The level column should now show the word ‘Customized’ for all outputs that are less than all levels. Note: Multiple outputs may be highlighted. To group multiple outputs, click and hold the mouse button down on the first output and then using the ‘Shift’ key or the ‘Ctrl’ key, click on all the other outputs that are needed.
- Click the ‘View All Salvos’ button just above the table to see all salvos that are configured. This will show each output with the source assigned to it as well as if they will switch all levels or not. To see which levels the customized outputs will switch, simply single click on any output line and it will show the levels above in the ‘Selected Levels’ window. The figure below shows all items discussed above.
To delete a single salvo line, click on that output and then click the ‘Delete’ button located to the right of the ‘Select Levels’ table. Use the grouping procedure from above for selecting multiple outputs or entire salvo groups and deleting them with the same delete button.