From Existing Controller
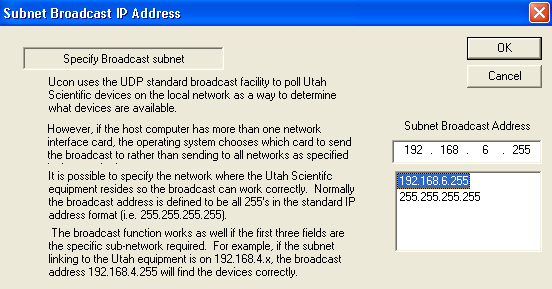
1. Click the menu item called ‘Program’ at the top of the screen and then select the item called ‘Broadcast Subnet’. When the following window below appears, either click the desired subnet from the address window or type the subnet in the address line. The subnet must be the same as the SC4 that is connected to the working computer and the last entry should be 255. Then click OK to activate the entry.
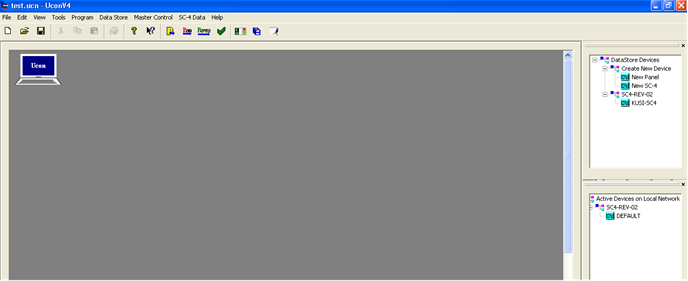
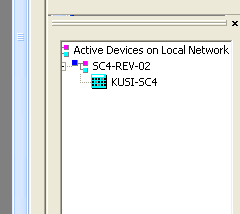
- The SC4 found on that subnet should now appear in the lower right corner of the UCONV4 screen. The name may appear as ‘DEFAULT’ or something else, as seen in the following picture below.
- Launch the NFS Server application if it is not already running. If it is not already a shortcut on the desktop, then click on the ‘Start’ item in the lower left corner of the computer and then go to ‘Programs’ and it will be listed as ‘ProNFS’.
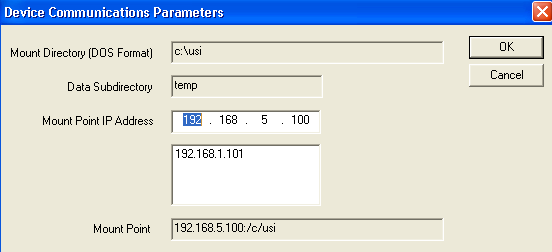
- Make sure the mount point for transferring data is set to the computers IP Address. To do this, click on the top menu item in UCONV4 called ‘Program’ and then select the item called ‘Setup Transfer Parameters’. Enter the IP address of the computer in the ‘Mount IP Address’ line.
- Right click on the name for the SC4, shown in the lower right corner of UCONV4, and select ‘Rename’. The SC4 example name above is called ‘DEFAULT’.
- Type in the desired name for the SC4 and then click OK as seen in the next diagram below. This name will appear on the Icon that is added to the system screen. The window will also show the model type such as an SC4 or SC400 as well as its current name and the IP address of the SC4 chassis.
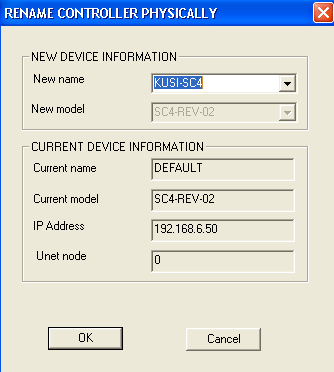
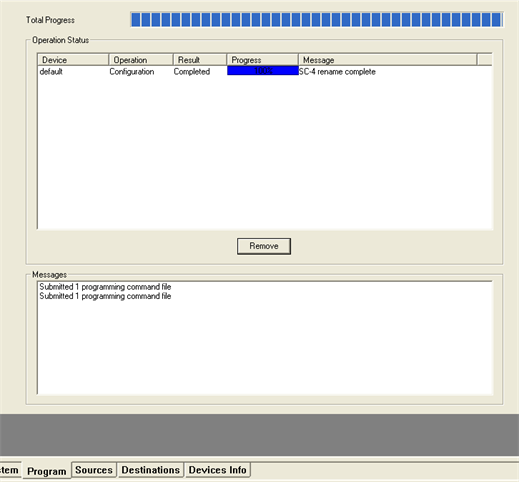
- The name is actually programmed into the controller and should automatically update in the lower right corner of UCONV4, (as seen above right). If it does not update, then click on the ‘Program’ tab at the bottom of the screen to see the programming progress that was made. Any errors as well as successes will be noted in the message window.
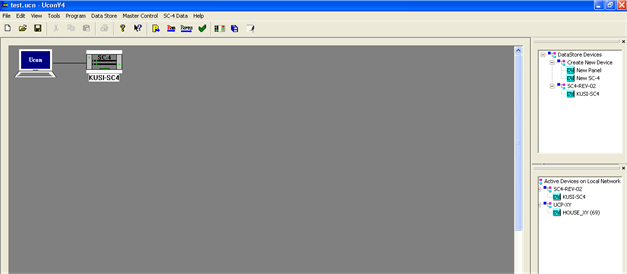
- Next, add the new SC4 from the lower right corner of UCONV4 to the system screen by right clicking it and simply selecting ‘Add Device to System’. A new SC4 icon will appear on the system screen with the same name as the lower right corner device and it will have no red box around it.
Note: If at any time the name must be changed, both the names on the system screen and the lower right corner will need to be renamed and must be exactly the same.
- Once the name is set, then follow the steps in method 1 above to configure the mapping tables in the controller, beginning with step 3.