Importing Configuration from Controller
There are two instances where the configuration file would be imported into the UCONV4 application ‘System’ view. The first is into a new system and the second is into an existing data store, which may or may not have control panels configured.
Importing Into a New System
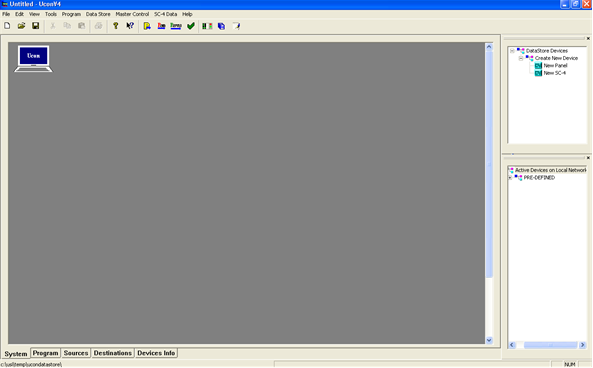
- From the main ‘System’ view, which should be blank as in the figure below, click on the top menu item titled ‘SC-4 Data’ and select the item called ‘Import SC-4 Config File’.
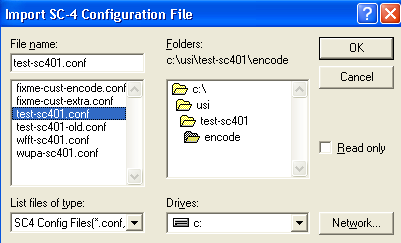
- When the window opens requesting where to find the configuration file, navigate in the right window to c:\usi\xxxx-sc401\encode, which will then show all of the files within that encode folder, in the window to left.
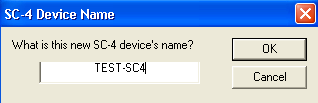
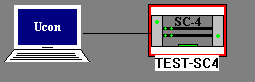
- With the correct file highlighted in the left window, click ‘OK’ and then type the desired name for the SC4 in the window that will appear next. This can be any desired name, including alpha, numeric and other characters. Note: Spaces are not allowed and will cause problems when trying to rename the actual SC4/400. The new icon will then appear on the screen with a red box around it. Note: When the actual SC4 is connected to the screen it will need to be renamed. Follow the steps above for renaming the controller in the section titled ‘Method 2’. Verify that all the mapping tables and the source and destination tables are correct. See steps above for locations of the tables.
- It is extremely important that this data store is now saved to a different location than the default location, which is most likely where the data store is at the moment. Go to ‘File’ at the top of UCONV4 and select the ‘Save As’ item. Note: DO NOT save this in the c:\ucondatastore folder. You must create a new location in another directory on the pc. We recommend it be saved in c:\usi\current datastore which may need to be created.